Introduction
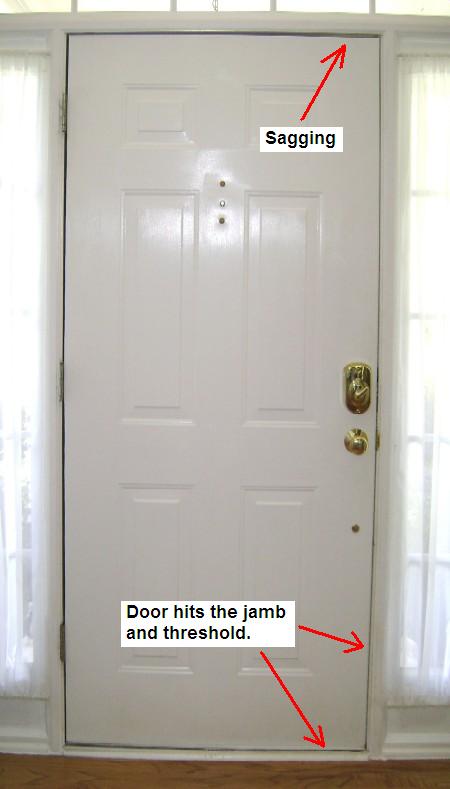
Nothing mars the stately elegance of an abode like a sagging front door. It’s not just an aesthetic nuisance; it can also compromise your home’s security and energy efficiency. Fortunately, there are time-tested methods to restore your front door to its rightful position, restoring both beauty and functionality to this essential portal. In this comprehensive guide, we will delve into the world of door repair, providing you with the know-how to fix a sagging front door like a seasoned pro.

Image: www.universalwindowsdirect.com
The most common cause of door sagging is a weakening of the hinges, often due to years of use or poor installation. Moreover, environmental factors, such as humidity and temperature fluctuations, can also wreak havoc on your door’s alignment. Sagging doors are more likely to allow air and moisture to infiltrate your home, potentially leading to costly energy loss and uncomfortable living conditions.
Tools and Safety Equipment
Before embarking on any door repair venture, it’s crucial to arm yourself with the appropriate tools and safety gear. Here’s a checklist for your convenience:
- Screwdriver
- Hammer
- Chisel
- Level
- Wedges
- Safety glasses
- Work gloves
Step-by-Step Guide to Fixing a Sagging Door
With your tools and safety gear in order, let’s embark on a step-by-step journey to restore your door’s former glory:
1. Determine the Sagging Direction
Don’t rush into tightening screws just yet. First, observe the direction of the door’s sag. Is it tilting towards the hinge side or towards the latch side? This observation will guide your subsequent repair strategy.

Image: www.pinterest.com
2. Tighten the Screws
Sometimes, the solution to a sagging door is as simple as tightening the screws that hold the hinges in place. Using your screwdriver, gently tighten each screw, ensuring not to over-tighten and strip the threads.
3. Insert Wedges
If tightening the screws proves futile, inserting wedges into the hinge gaps can provide additional support and lift the door. Choose wedges of appropriate thickness and tap them into place using a hammer.
4. Adjust the Strike Plate
In instances where the door sags into the latch, adjusting the strike plate can offer a simple and effective remedy. Loosen the screws holding the strike plate, shift it slightly upward or downward, and re-tighten the screws.
5. Replace Worn-Out Hinges
If all else fails, it may be time to replace the hinges themselves. Begin by removing the screws and carefully detaching the old hinges. Ensure the new hinges align perfectly with the old screw holes to maintain the door’s alignment.
6. Lubricate Hinges
Regular lubrication of hinges is essential for smooth and efficient door operation. Apply a lubricant designed specifically for door hinges to reduce friction and minimize wear.
Preventing Future Door Sagging
Once you’ve successfully repaired your sagging door, here are some tips to help prevent the issue from recurring:
- Avoid overloading the door with heavy decorations.
- Regularly inspect hinges for signs of wear or damage.
- Re-tighten screws and lubricate hinges as needed.
- If the issue persists despite these measures, consult a professional for further assistance.
How To Fix Front Door Sagging
Conclusion
With the right tools and a touch of patience, you’ve now empowered yourself with the knowledge to fix a sagging front door and restore your home’s stately charm. Remember, maintaining your door regularly through tightening screws, lubricating hinges, and adjusting the strike plate will help prevent future sagging and ensure your entryway remains welcoming for years to come. Should you encounter any difficulties, don’t hesitate to seek professional help for a foolproof and long-lasting repair.


