
Find the latest information about How To Create A Distribution List In Office 365 in this article, hopefully adding to your knowledge.
How to Create a Distribution List in Office 365
Communication is vital in the workplace, and having an effective way to communicate with groups of people can save time and increase productivity. Distribution lists in Office 365 allow you to send emails to a specific group of people with a single address, making it easier to keep everyone informed and on the same page. In this comprehensive guide, I will take you through the steps of creating and managing distribution lists in Office 365.
Before we dive into the details, let’s start with a brief definition. A distribution list, also known as a contact group or mailing list, is a collection of email addresses that you can treat as a single entity when sending emails. It’s an essential tool for sending emails to a predefined group of recipients, ensuring that everyone in the group receives the message without the need to manually add each individual’s email address.
Creating a Distribution List
Follow these steps to create a distribution list:
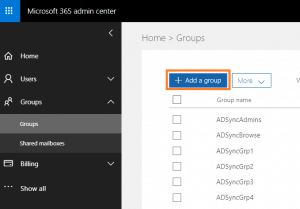
- Sign in to your Office 365 account and navigate to the People tab.
- Click on the “Create” button and select “Distribution list” from the drop-down menu.
- Enter a name for the distribution list in the “Name” field.
- In the “Members” section, add the email addresses of the people you want to include in the distribution list. You can type in their names or email addresses, and Office 365 will suggest matches from your contacts.
- Click on the “Save” button to create the distribution list.
Managing Distribution Lists
Once you’ve created a distribution list, you can manage it by:
- Editing the membership: Add or remove members by clicking on the “Members” section and making the necessary changes.
- Changing the name or description: Edit the distribution list’s name or description by clicking on the “Edit” button next to the list’s name.
- Setting permissions: Control who can send emails to the distribution list by setting permissions in the “Permissions” section.
- Deleting the distribution list: If you no longer need a distribution list, you can delete it by clicking on the “Delete” button.
Tips for Effective Use
Here are some tips to help you use distribution lists effectively:
- Use descriptive names: Make sure the distribution list’s name clearly indicates its purpose.
- Keep your lists up-to-date: Regularly review and update the membership of your distribution lists to ensure that only the relevant people are included.
- Use permissions wisely: Set permissions to control who can send emails to the distribution list, preventing unauthorized emails from being sent.
- Consider using dynamic distribution lists: Dynamic distribution lists automatically update their membership based on criteria you specify, ensuring that the list always includes the most relevant recipients.
- Be mindful of the size of your lists: Large distribution lists can slow down email delivery, so try to keep your lists to a manageable size.
Frequently Asked Questions
- Q: Can I create nested distribution lists?
A: Yes, you can create distribution lists that include other distribution lists as members. - Q: Can I send emails to distribution lists from outside my organization?
A: Yes, you can send emails to distribution lists from outside your organization, as long as the list’s permissions allow it. - Q: How can I search for distribution lists in Office 365?
A: You can search for distribution lists in the People tab by typing the list’s name or a keyword related to the list’s purpose.
Conclusion
Creating and managing distribution lists in Office 365 is a valuable skill that can significantly streamline communication within your organization. By following the steps outlined in this guide and incorporating the tips provided, you can create effective distribution lists that meet your specific communication needs. Are you looking for more ways to enhance your communication and collaboration in Office 365? Let us know in the comments below!
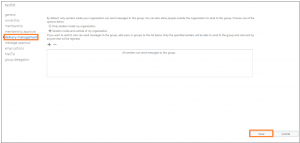
Image: www.nucleustechnologies.com
You have read How To Create A Distribution List In Office 365 on our site. Thank you for your visit. We hope you benefit from How To Create A Distribution List In Office 365.


