
A roof leak can be a major headache, not to mention a costly problem if not addressed promptly. While some leaks may require professional assistance, there are many instances where you can fix the issue yourself from the comfort of your home. In this comprehensive guide, we will provide you with a step-by-step walkthrough on how to repair a roof leak from the inside, empowering you to tackle this common issue with confidence and precision.
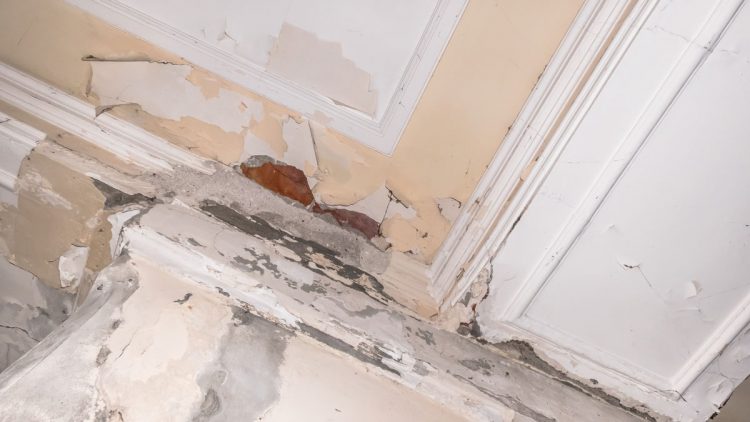
Image: www.paulsroofing.com
Identifying the Source of the Leak
Before you can fix a roof leak, it’s essential to pinpoint the exact location where the water is entering. Start by inspecting your roof from the outside, looking for any visible signs of damage, such as cracked or missing shingles, damaged flashing, or deteriorated sealant. If you cannot identify the source from outside, move to the interior of the affected area and examine the ceiling or walls for water stains or dampness. Once you’ve found the leak’s origin, you can begin the repair process.
Assessing the Damage
Once you’ve identified the source of the leak, it’s crucial to determine the extent of the damage. Assess the affected areas carefully, noting the severity of the leak and any accompanying damage to insulation, drywall, or structural components. This assessment will help you gauge the urgency of the repair and decide whether professional assistance is necessary.
Gathering Materials
Before embarking on the repair, ensure you have all the necessary materials on hand. This typically includes:
-
Patching materials (roof cement, roofing felt, or rubberized sealant)
-
Roofing nails or screws
-
Plywood or OSB (if replacing damaged sheathing)
-
Safety gear (gloves, safety glasses, and a mask)
Image: azdesertsunroofing.com
Preparing the Area
Once you have your materials, prepare the area around the leak. Remove any furniture or belongings that could obstruct your work. Cover the floor with a tarp or plastic sheeting to protect it from water and debris.
Sealing the Leak
Now it’s time to seal the leak. The method you use will depend on the nature of the leak. For small holes or cracks, a simple patch of roofing cement or sealant may suffice. Apply the patch generously, ensuring it covers the entire damaged area and extends beyond its edges. For larger holes or damaged sheathing, you may need to replace the affected section. Cut a piece of plywood or OSB to fit the damaged area, secure it with roofing nails, and seal the edges with roofing cement.
Removing Standing Water
If there is any standing water in the affected area, remove it promptly to prevent further damage. Use a bucket, mop, or wet/dry vacuum to extract the water. Once the area is dry, allow it to air out thoroughly to prevent mold growth.
Repairing Interior Damage
Once the leak has been sealed, it’s time to address any interior damage caused by the water. If the drywall has been damaged, you may need to cut out the affected section and replace it with a new piece. Similarly, if the insulation has become wet, it will need to be removed and replaced. Always ensure the area is completely dry before repairing or replacing interior components.
How To Fix Roof Leak From Inside
Conclusion
Fixing a roof leak from the inside can be a rewarding task that saves you time and money. By following the steps outlined in this guide, you can effectively address common roof leaks without requiring professional assistance. Remember to approach the repair with safety as your top priority, and don’t hesitate to seek professional help if the leak is extensive or you are unsure how to proceed. With a little effort and know-how, you can restore your roof to its former glory and protect your home from further water damage.


