
How to Fix a Waterlogged Bladder Pressure Tank: A Complete Guide
Imagine turning on your faucet expecting a refreshing gush of water, only to be met with a feeble trickle. It’s every homeowner’s nightmare. But before you call a plumber, consider that the culprit may be your waterlogged bladder pressure tank. This guide will equip you with the comprehensive knowledge and step-by-step instructions to fix a waterlogged bladder pressure tank like a pro, saving you both time and money.

Image: 411plumb.com
A waterlogged pressure tank is like a silenced bell, rendering your plumbing system ineffective. It’s the unsung hero of your water supply, silently maintaining consistent water pressure throughout your home. However, when this pressurized tank becomes waterlogged, it loses its ability to provide the necessary force for water distribution. In this article, we will delve into the intricacies of a water pressure tank, exploring its components and explaining how to identify and remedy waterlogging.
Understanding Bladder Pressure Tanks
A bladder pressure tank is an essential component of a domestic water system. It’s typically a steel tank, partially filled with water and a rubber bladder inside. The bladder separates the water from the air in the tank. An air compressor fills the space between the bladder and the tank with air, creating pressure. This pressurized air pushes against the bladder, which in turn forces water out of the tank and into your plumbing system.
The average lifespan of a bladder pressure tank is around 5 to 10 years, depending on the water quality and usage. However, several factors can lead to premature waterlogging, such as a faulty air compressor, a punctured bladder, or excessive sediment buildup. If you suspect your tank may be waterlogged, it’s crucial to address the issue promptly to avoid further plumbing problems.
Identifying a Waterlogged Bladder Pressure Tank
Before attempting to fix a waterlogged pressure tank, it’s important to confirm the diagnosis. Here are a few telltale signs that your tank may be waterlogged:
- Reduced water pressure: A waterlogged tank cannot maintain sufficient pressure, resulting in weak water flow from faucets and showerheads.
- Constant water cycling: A faulty tank may cause your pump to turn on and off frequently, even when no water is being used.
- Waterlogged bladder: If the bladder is waterlogged, it may become misshapen or distorted.
- Leaking tank: A waterlogged tank may develop leaks, allowing water to escape.
Step-by-Step Guide to Fixing a Waterlogged Pressure Tank
If you’ve determined that your bladder pressure tank is waterlogged, follow these steps to fix it:
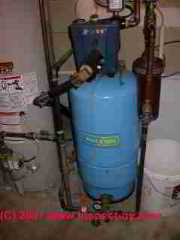
Image: inspectapedia.com
1. Turn off the power and water supply
Safety first! Turn off the power to your water pump and shut off the main water supply valve. This will prevent water from flowing into the tank while you’re working on it.
2. Drain the tank
Connect a hose to the drain valve at the bottom of the tank and open the valve. Allow all the water to drain out. Close the valve once the tank is empty.
3. Inspect the bladder
Remove the bolts that hold the tank together and carefully separate the halves. Inspect the bladder for any punctures or tears. If you find any damage, you will need to replace the bladder.
4. Clean the tank
Use a mild cleaning solution to clean the inside of the tank. Remove any sediment or debris that may have accumulated. Rinse the tank thoroughly and allow it to dry completely.
5. Install a new bladder (if necessary)
If you replaced the bladder, insert the new one into the tank and secure it according to the manufacturer’s instructions.
6. Reassemble the tank
Carefully reassemble the tank, ensuring that the bladder is properly positioned and the bolts are tightened securely.
7. Reconnect the water supply and power
Turn on the main water supply valve and restore power to your water pump. Allow the tank to fill with water and pressurize. Check for any leaks.
How To Fix A Waterlogged Bladder Pressure Tank
Conclusion
Fixing a waterlogged bladder pressure tank may seem like a daunting task, but with the right knowledge and tools, you can save yourself a costly repair bill. Remember to follow the steps outlined in this guide, and if you encounter any unexpected issues, don’t hesitate to consult a qualified plumber. By proactively addressing a waterlogged bladder pressure tank, you can ensure a steady and reliable water supply for your home.


