
Leather jackets, with their rugged elegance and timeless appeal, are wardrobe staples that can elevate any outfit. However, accidents happen, and a tear in your prized leather jacket can be disheartening. Fret not, for with the proper guidance, you can restore your jacket’s former glory and extend its lifespan. This comprehensive guide will provide you with everything you need to know about fixing a leather jacket tear.
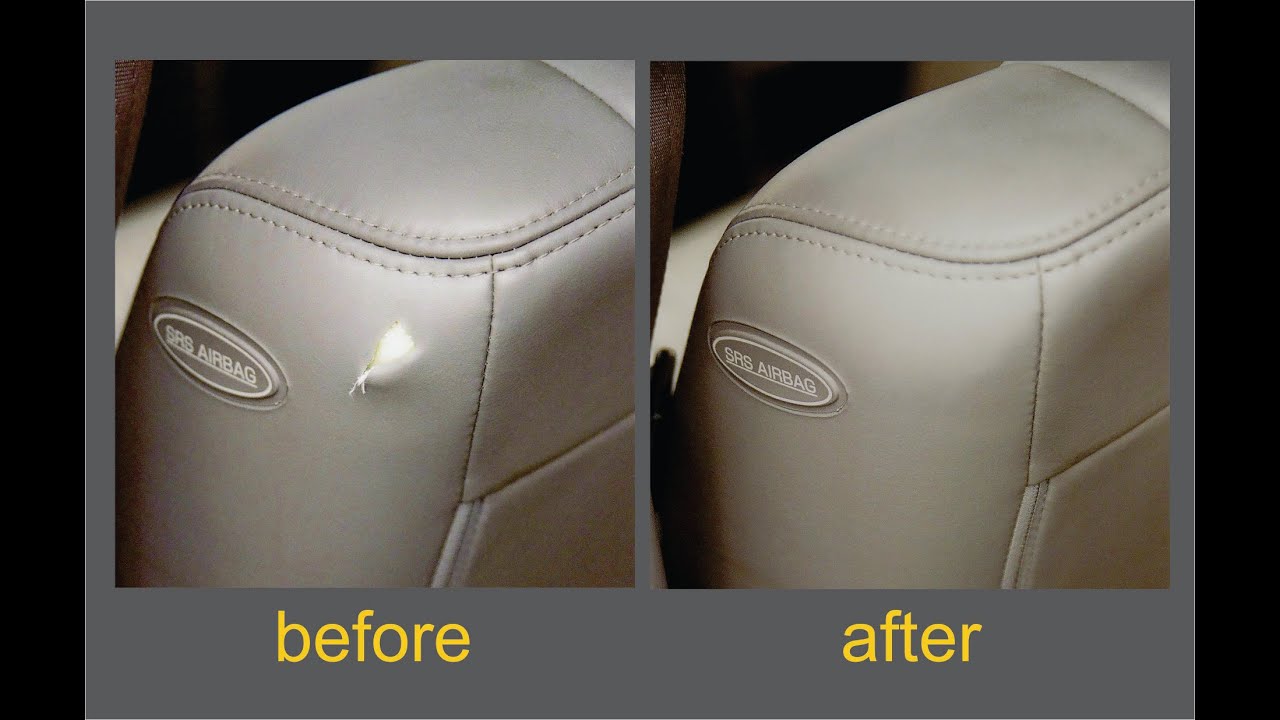
Image: repair-faq.com
Assessing the Tear
Before embarking on the repair process, it’s crucial to assess the extent of the tear. Identifying the type and location of the tear will determine the most appropriate repair method. Common leather tear types include:
- Linear tears: Straight, clean cuts usually caused by sharp objects.
- Irregular tears: Jagged or uneven rips often caused by snagging or abrasion.
- Puncture tears: Holes caused by sharp objects like knives or studs.
The location of the tear also matters. Tears on exposed areas like the sleeves or front panels require more visible repair methods compared to those on hidden areas such as the inner lining.
Tools and Materials
Gathering the necessary tools and materials is essential for a successful repair:
- Leather needle and thread
- Leather glue
- Denatured alcohol
- Cotton swabs
- Soft cloths
- Toothpicks or plastic sticks
- Leather filler or compound (for larger tears)
Step-by-Step Repair Methods
Depending on the tear type and location, choose one of the following repair methods:
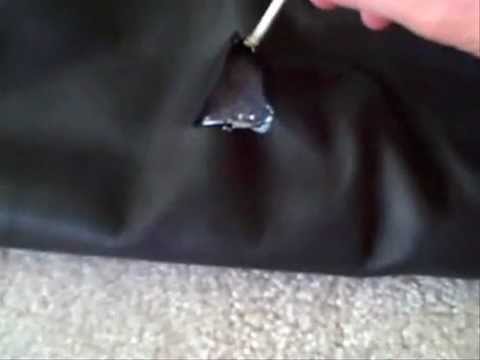
Image: www.youtube.com
Linear Tear Repair
- Clean the torn edges with denatured alcohol using a cotton swab to remove dirt and oils.
- Apply a thin layer of leather glue along one edge of the tear.
- Carefully align the torn edges and press them together firmly.
- Use toothpicks or plastic sticks to secure the edges in place.
- Stitch the tear using a saddle stitch (or other appropriate stitch) with a leather needle and thread.
Irregular Tear Repair
- Clean and glue as described in the linear tear repair method.
- Cut a small piece of leather filler that roughly matches the shape of the tear.
- Apply a small amount of leather glue to the back of the leather filler.
- Position the leather filler inside the tear and press it in place.
- Allow the glue to dry completely before stitching the edges.
Puncture Tear Repair
- Clean the area around the puncture with denatured alcohol.
- Apply a small drop of leather glue to the edges of the puncture.
- Use a toothpick or plastic stick to spread the glue evenly.
- Carefully insert a leather needle and thread through the puncture from the inside of the jacket.
- Stitch the puncture closed using a saddle stitch or other appropriate stitch.
Tips for a Successful Repair
- Match the thread color to the jacket for a more seamless repair.
- Use a sharp needle to prevent snagging and tearing of the leather.
- Apply glue sparingly to avoid spreading.
- Work in a well-ventilated area to avoid inhaling fumes from the glue.
- Allow ample drying time for the glue to set properly.
- If the tear is large or complex, consider seeking professional repair services for optimal results.
How To Fix A Leather Jacket Tear
Conclusion
With patience and precision, you can successfully repair a leather jacket tear and restore its pristine condition. Remember to assess the tear, gather the right tools, and follow the appropriate repair method. Your cherished leather jacket will thank you for the care and attention, ensuring it remains a timeless companion for years to come.


